How to deploy a SvelteKit website to GitHub pages
Resources
SvelteKit version: 1.5.0
GitHub repo: https://github.com/JustinyAhin/sveltekit-github-pages
Aside from being great for building complex web apps, SvelteKit can also be used (and actually works great) for building static websites. This is a guide on how to deploy a SvelteKit website to GitHub pages.
Create a new SvelteKit project
The first step is of course to create a new SvelteKit project. You can do this by running the following command:
pnpm create svelte@latest your-webiste-nameNext, we need to install the dependencies and run the app to make sure everything is working as expected:
cd your-webiste-name
pnpm install
pnpm dev
Use the SvelteKit static adapter
Since GitHub Pages is a static website hosting, we need to use the SvelteKit static adapter. To do this, we need to install the adapter:
pnpm add -D @sveltejs/adapter-staticAnd then, in the svelte.config.js file, we need to replace @sveltejs/adapter-auto with @sveltejs/adapter-static. Our configuration will look like this:
import adapter from '@sveltejs/adapter-static';
import {
    vitePreprocess
} from '@sveltejs/kit/vite';

/** @type {import('@sveltejs/kit').Config} */
const config = {
    preprocess: vitePreprocess(),

    kit: {
        adapter: adapter()
    }
};

export default config;
Set the base path
By default, the SvelteKit static adapter will generate the website in the root of the build folder. However, GitHub Pages will serve the website from a subfolder. To fix this, we need to set the paths. base property in the svelte.config.js file.
The base path should be the name of the repository. For example, if the repository is sveltekit-github-pages, the base path should be /sveltekit-github-pages. Our configuration will look like this:
const config = {
    preprocess: vitePreprocess(),

    kit: {
        adapter: adapter(),
        paths: {
            base: process.env.NODE_ENV === 'production' ? '/sveltekit-github-pages' : '',
        }
    }
};
On top of that, the relative links in the project should be prefixed with the base path. For example, if we have a link to the about page, we should use /sveltekit-github-pages/about instead of /about.
Here is what this looks like in a Svelte component:
<script lang="ts">
    import { base } from '$app/paths';
</script>

<nav>
    <a href="{base}/">Home</a>
    <a href="{base}/about">About</a>
</nav>
This will prevent getting a 404 error when navigating to a page directly.
Bypassing Jekyll
By default, GitHub Pages will try to build the website using Jekyll. However, we don't want this to happen since we are building the website using SvelteKit. To bypass Jekyll, we need to create a .nojekyll file in the static folder. This will tell GitHub Pages to not use Jekyll.
See https://docs.github.com/en/pages/getting-started-with-github-pages/about-github-pages#static-site-generators for more information about this.
Deploy to GitHub Pages
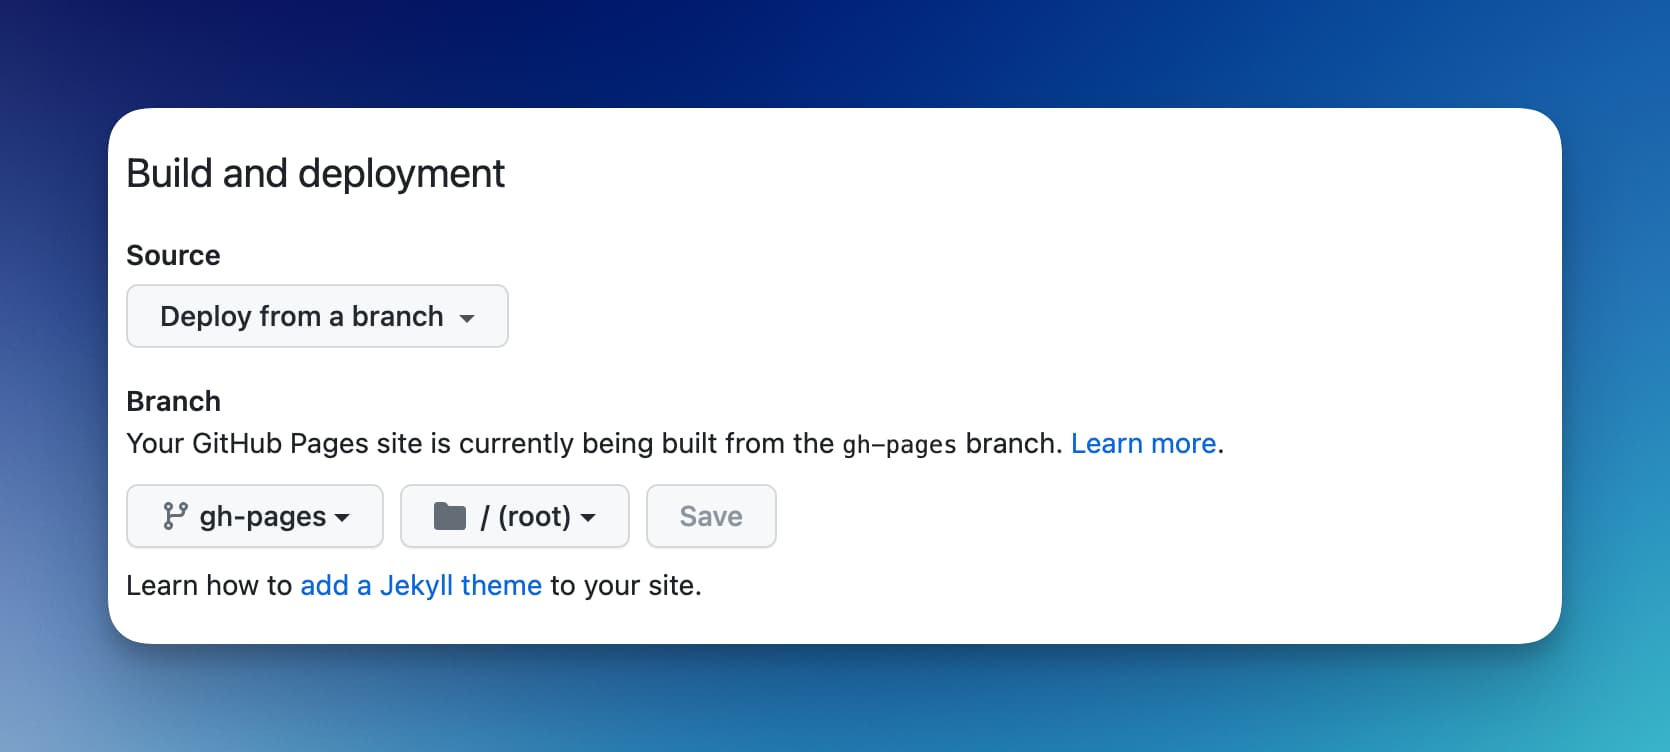
Now that everything is set up, we can deploy the website to GitHub Pages. After pushing the repository to GitHub, we need to set the publishing source for the website on Pages. Ideally, the source should be a separate branch on the repository. For example, we can create a gh-pages branch and set it as the publishing source.
Go to the repository settings, then to the Pages tab. Select the gh-pages branch as the publishing source and click on Save.
The most straightforward way to deploy the website is to just build the website locally by running pnpm build , and copying the content of the build folder to the gh-pages branch. Every time a commit is made to the gh-pages branch, GitHub Pages will automatically deploy the new version of the website.
Other deployment options
Using the gh-pages npm package
Instead of manually copying the content of the build folder to the gh-pages branch, we can use the gh-pages npm package to automate this process. To do this, we need to install the package:
pnpm add -D gh-pagesThen, we need a new script in the package.json file to deploy the website:
{
    "scripts": {
        "deploy": "pnpm build && pnpx gh-pages -d build -t true"
    }
}
Finally, we can run the script to deploy the website:
pnpm deployThis will automatically build the website and trigger the deployment to GitHub Pages.
Using GitHub Actions
Instead of deploying the website manually, we can use GitHub Actions to automate the deployment. With a simple workflow, we can trigger a deployment every time a commit is made to the main branch.
Checkout this page for more information about this.