Headless WordPress with GraphQL and SvelteKit
Resources
SvelteKit version: 1.5.0
WordPress version: 6.1.1
GitHub repository: https://github.com/JustinyAhin/okupter-repos/tree/main/apps/headless-wordpress-graphql-sveltekit
When I started writing about SvelteKit, I knew at some point that I’d have to write about how to use it with WordPress. I’ve been using WordPress for a long time now, and the same goes for SvelteKit. At my day job, we use a lot of headless WordPress coupled with Next.js frontends. And I’ve been wondering how the setup and the development experience would be with SvelteKit.
Here we go, then. This post describes my attempt to set up a headless WordPress with GraphQL and SvelteKit.
Why even use WordPress in headless mode?
WordPress in itself can already be a great tool for building websites (when used for the right use case). You can pretty much build any kind of website with it. And you can do it now without too much hassle with some great tools that have been built around it. I’m thinking about page builders like Elementor or the block editor in WordPress itself.
So, why would you want to use WordPress in headless mode?
The most obvious reason I can see is the workflow/tooling or technologies you or your team are already used to. If you have some experience with building custom websites with Next.js, React, or other web technologies, you might get a lot of value and a better developer experience by using WordPress in headless mode.
Another possible reason is that you can get more flexibility and fine-grained control over your website by using WordPress in headless mode. To some extent, you can get those perks by using WordPress as your E2E solution, but this aspect is definitely more prominent in headless mode.
How would that work?
Basically, think of headless WordPress + GraphQL + SvelteKit as any other stack where you have a backend (data store), a frontend (the website), and a way to connect the two. In this case, the backend is WordPress, the frontend is SvelteKit, and the way to connect the two is GraphQL.
Since the visual presentation will be handled by SvelteKit, we will use WordPress to store our data; posts, pages, custom post types, custom fields, etc.
There is already some great and mature tooling for connecting WordPress to various frontends.
We’ll mainly be using WPGraphQL for the GraphQL API and schema for the WordPress backend. Additionally, and depending on your needs, you might want to use WPGraphQL for Advanced Custom Fields to expose your custom fields to the GraphQL API and WPGraphQL Yoast SEO Addon to expose your Yoast SEO data to the GraphQL API.
Another plugin that you might find useful is the WPGraphQL JWT Authentication plugin. It allows you to authenticate your request when you are making requests through the WPGraphQL API.
I will not use authenticated requests for this blog post to keep things simple. I plan to write another post about using the JWT authentication plugin with SvelteKit.
Setting up WordPress
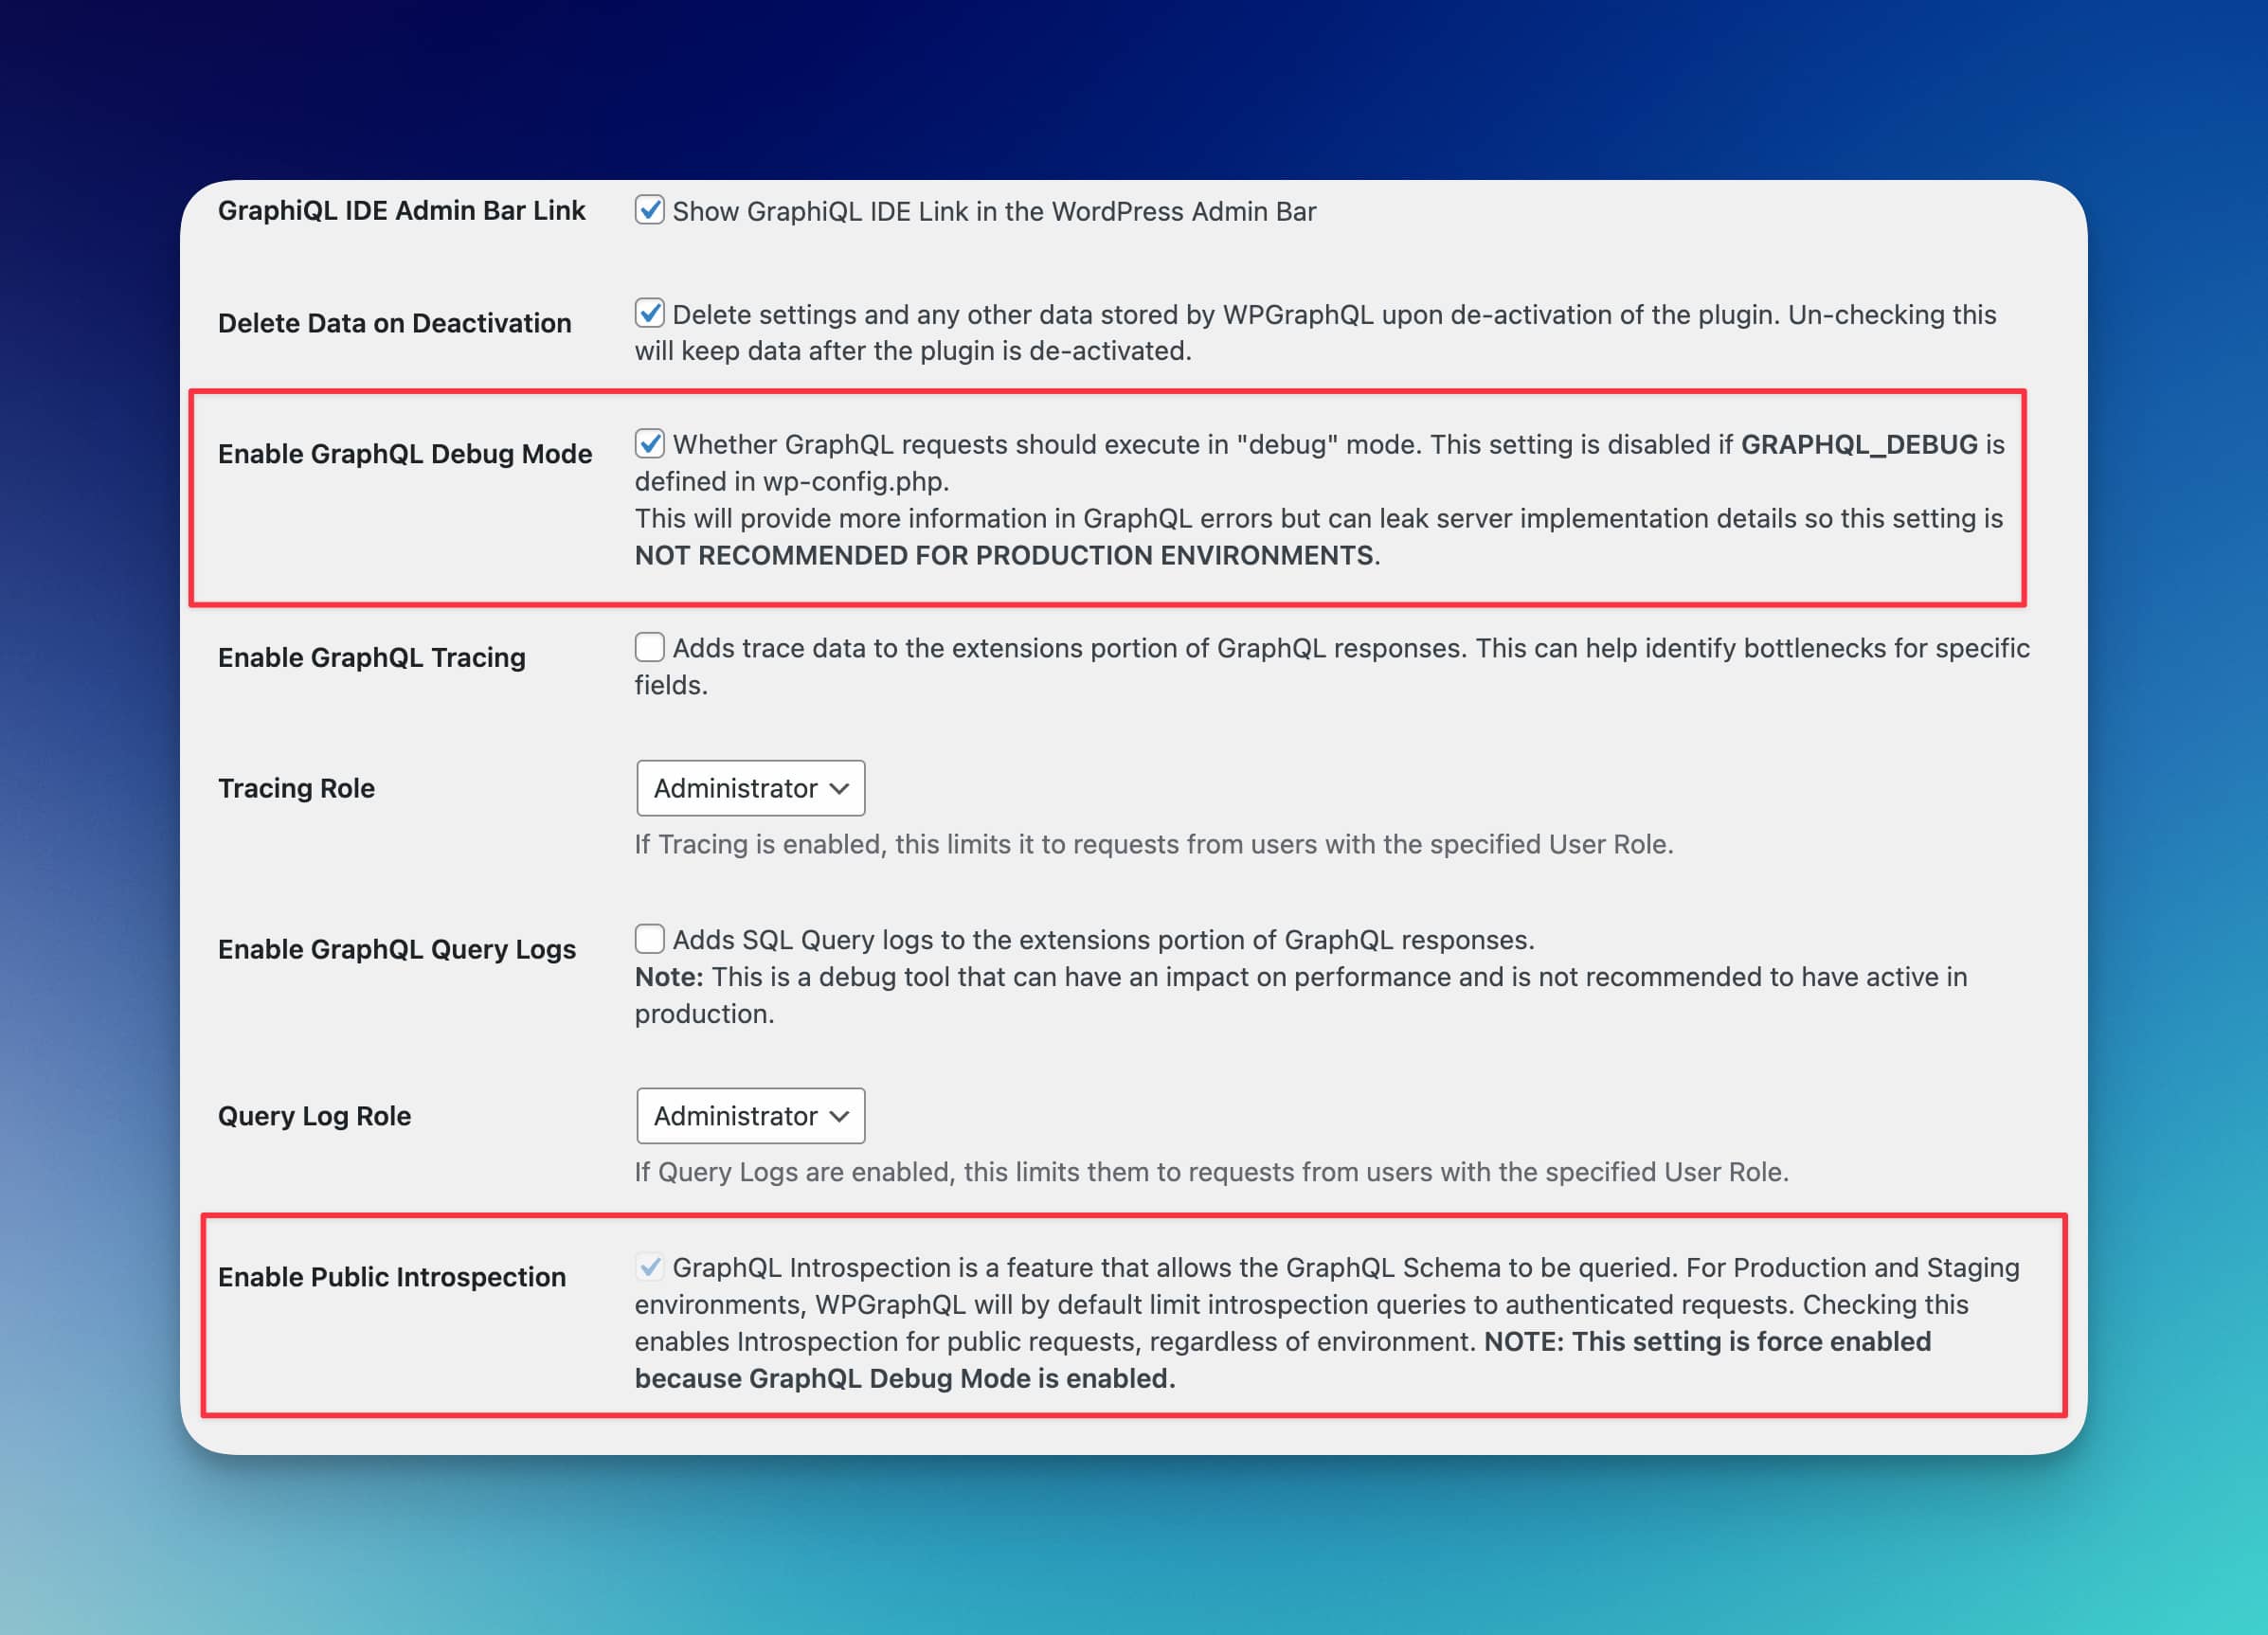
There are not many settings to set up on the WordPress side to have things working. After you've installed and activated the WP GraphQL plugin, go to the settings page ( GrapgQL > Settings ) and enable the debug mode and public introspection. This last setting will help get the GraphQL schema for our frontend and generate a type-safe client that we can use for a better developer experience.
You can now access your GraphQL endpoint at https://your-wordpress-site.com/graphql.
Creating a type-safe GraphQL client in SvelteKit
I'm not going to extend how to create a SvelteKit project here. The official documentation is great, and you can find all the information you need to get started. An important thing, though: please, use TyeScript for this project. I can't stress enough how much better the developer experience is when you use SvelteKit with TypeScript. You can read my thoughts about TypeScript and SvelteKit.
For handling GraphQL requests on our site and generating a client, I'll be using GenQL, a type-safe query builder for GraphQL.
I came across it totally by coincidence while looking for lightweight GraphQL clients. And I'm really happy with it. I use it pretty much on all my projects that involve GraphQL.
The first step for using GenQL is installing its CLI globally.
pnpm i -g @genql/cliAnd the @genql/runtime as a dependency.
pnpm i @genql/runtimeThen you can use it as follows to generate introspection files for your GraphQL endpoint.
genql --endpoint https://your-wordpress-site.com/graphql --output generated --esmNotice that we use the --esm flag to generate ESM modules. This is important if your project is using ESM modules.
I'm going to run this command from the src/lib/data folder of my project.
To handle this step easily, you can make this command part of your build process by creating a script in your package.json file. (for this to work seamlessly, you'll need to install the @genql/cli package as a dev dependency)
"scripts": {
    "genql": "genql --endpoint https://your-wordpress-site.com/graphql --output generated --esm"
}
Now that we have the introspections files, we can create a client that we can use to make requests to our GraphQL endpoint.
{
    "exclude": ["./src/lib/data/generated/"]
}
// src/lib/data/client.ts
import { WORDPRESS_BASE_URL } from '$env/static/private';
import { createClient } from '$lib/data/generated';
const client = createClient({
url: `${WORDPRESS_BASE_URL}/graphql`
});
export { client };The WORDPRESS_BASE_URL is an environment variable that I've defined in my .env file and that I'm using to store the base URL of my WordPress site. You can read more about how environment variables work in SvelteKit here.
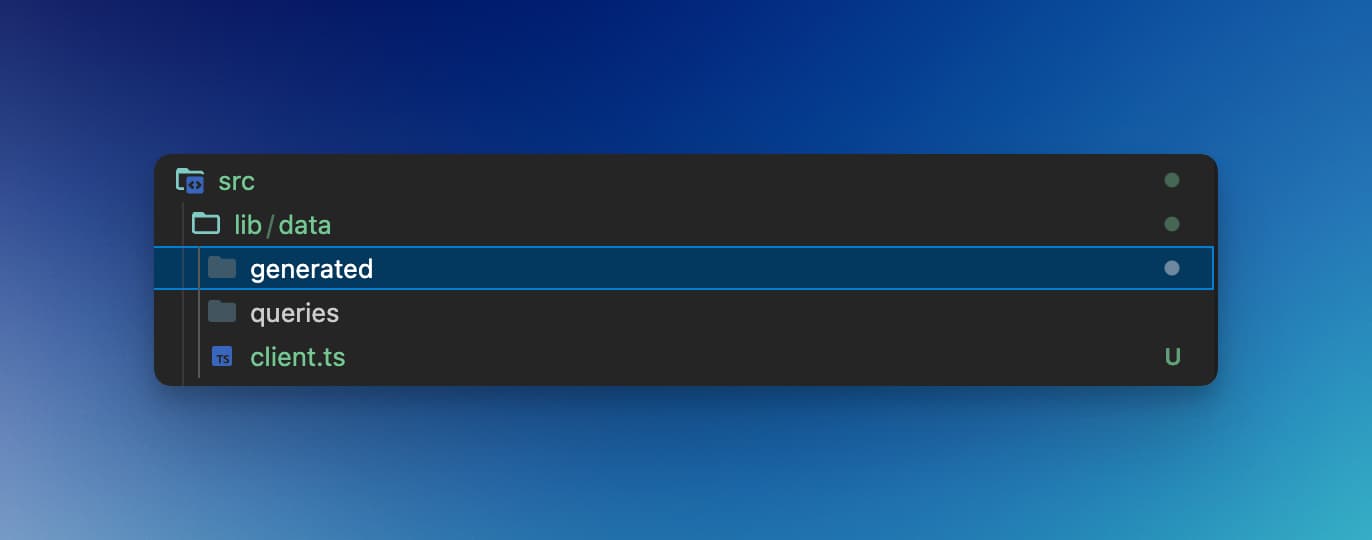
Now, we can start creating our queries. I like to have a queries folder in my data folder to store all my queries. Usually, my data folder looks like this:
The first and most obvious query to start with is the individual post query.
With GenQL, you write your queries in TypeScript, which allows you to get autocompletion, IntelliSense, and type safety in your definitions.
To make it easy when you start, they also provide this GraphQL query to TypeScript converter.
// src/lib/data/queries/post.ts

import { client } from "$lib/data/client";

const getSingleBlogPost = async (slug: string) => {
  const post = client.chain.query.post({ id: slug, idType: "SLUG" }).get({
    __typename: true,
    id: true,
    dateGmt: true,
    title: true,
    author: {
      node: {
        __typename: true,
        id: true,
        firstName: true,
        lastName: true,
        avatar: {
          url: true,
        },
      },
    },
    content: true,
    categories: {
      nodes: {
        __typename: true,
        id: true,
        name: true,
        slug: true,
      },
    },
  });

  return post;
};

export { getSingleBlogPost };
A few things to notice in the getSingleBlogPost() function:
I am using the
chainfunction from GenQL that gives the ability to chain the data we want from the query. This is useful when you have nested data, arguments, etc.The post slug is passed as an argument to the function. In
gql, this will look like:post(id: "hello-world", idType: SLUG) {}I use
__typenamein most of the fields. It is useful in case I need to check the type of data for conditional rendering, and it is generally a good practice.
Now, we can use this query in a new SvelteKit route for single blog posts.
// src/routes/[postSlug]/+page.server.ts

import { getSingleBlogPost } from '$lib/data/queries/posts';

export const load = async ({ params }) => {
    const { postSlug } = params;
    const post = await getSingleBlogPost(postSlug);

    return {
        post
    };
};
We are just getting the post data for a given slug within the load function and returning it to the component.
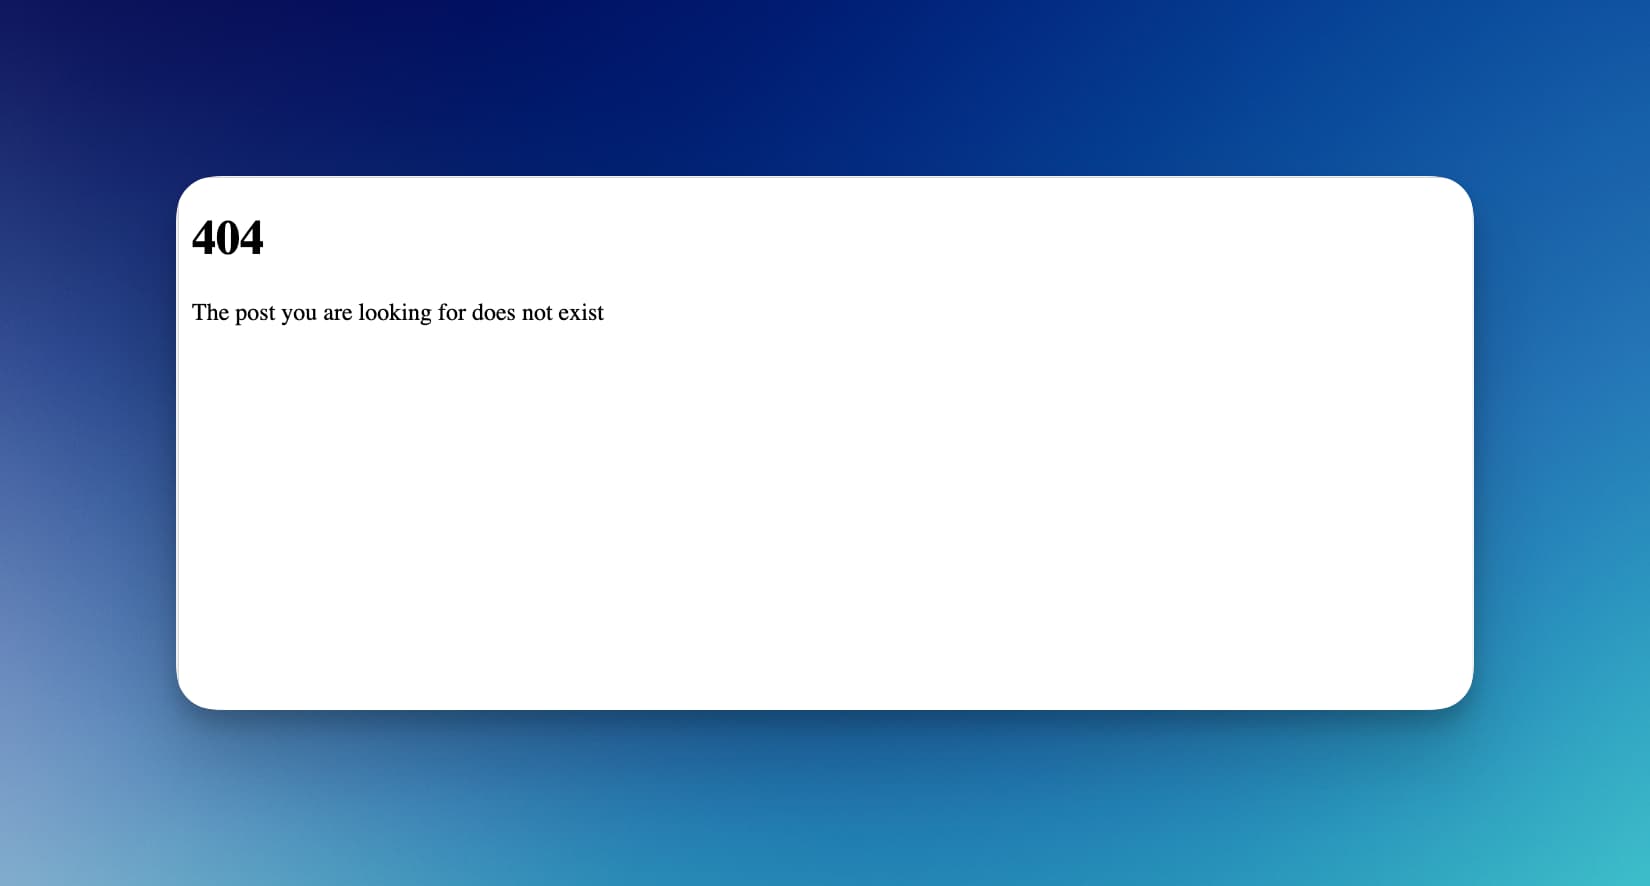
We could also do a bit of validation here by checking if the post exists and returning an error if it doesn't.
// src/routes/[postSlug]/+page.server.ts

import { getSingleBlogPost } from "$lib/data/queries/posts";
import { error } from "@sveltejs/kit";

export const load = async ({ params }) => {
  const { postSlug } = params;
  const post = await getSingleBlogPost(postSlug);

  console.log(post);

  if (!post) {
    throw error(404, {
      message: "The post you are looking for does not exist",
    });
  }

  return {
    post,
  };
};
If we navigate to a post slug that doesn't exist, we'll get a 404 error with our custom message.
In the route for single posts, we can now use the post data to render the post.
<script lang="ts">
    export let data;

    const { post } = data;

    const getHumanReadableDate = (date: string) => {
        const dateObj = new Date(date);

        const readableDate = new Intl.DateTimeFormat('en-US', {
            year: 'numeric',
            month: 'long',
            day: 'numeric'
        }).format(dateObj);

        return readableDate;
    };
</script>

<svelte:head>
    <title>{post.title}</title>
</svelte:head>

<header>
    <h1>{post.title}</h1>
    {#if post.dateGmt}
        <p>Written on {getHumanReadableDate(post.dateGmt)}</p>
    {/if}

    {#if post.author}
        <div class="author-box">
            <img
                src={post.author.node.avatar?.url}
                alt={`${post.author.node.firstName} ${post.author.node.lastName}`}
            />
            <p>Written by {post.author.node.firstName} {post.author.node.lastName}</p>
        </div>
    {/if}
</header>

<div class="post-content">
    {@html post.content}
</div>
With a few extra styles, our single post page will look like this:
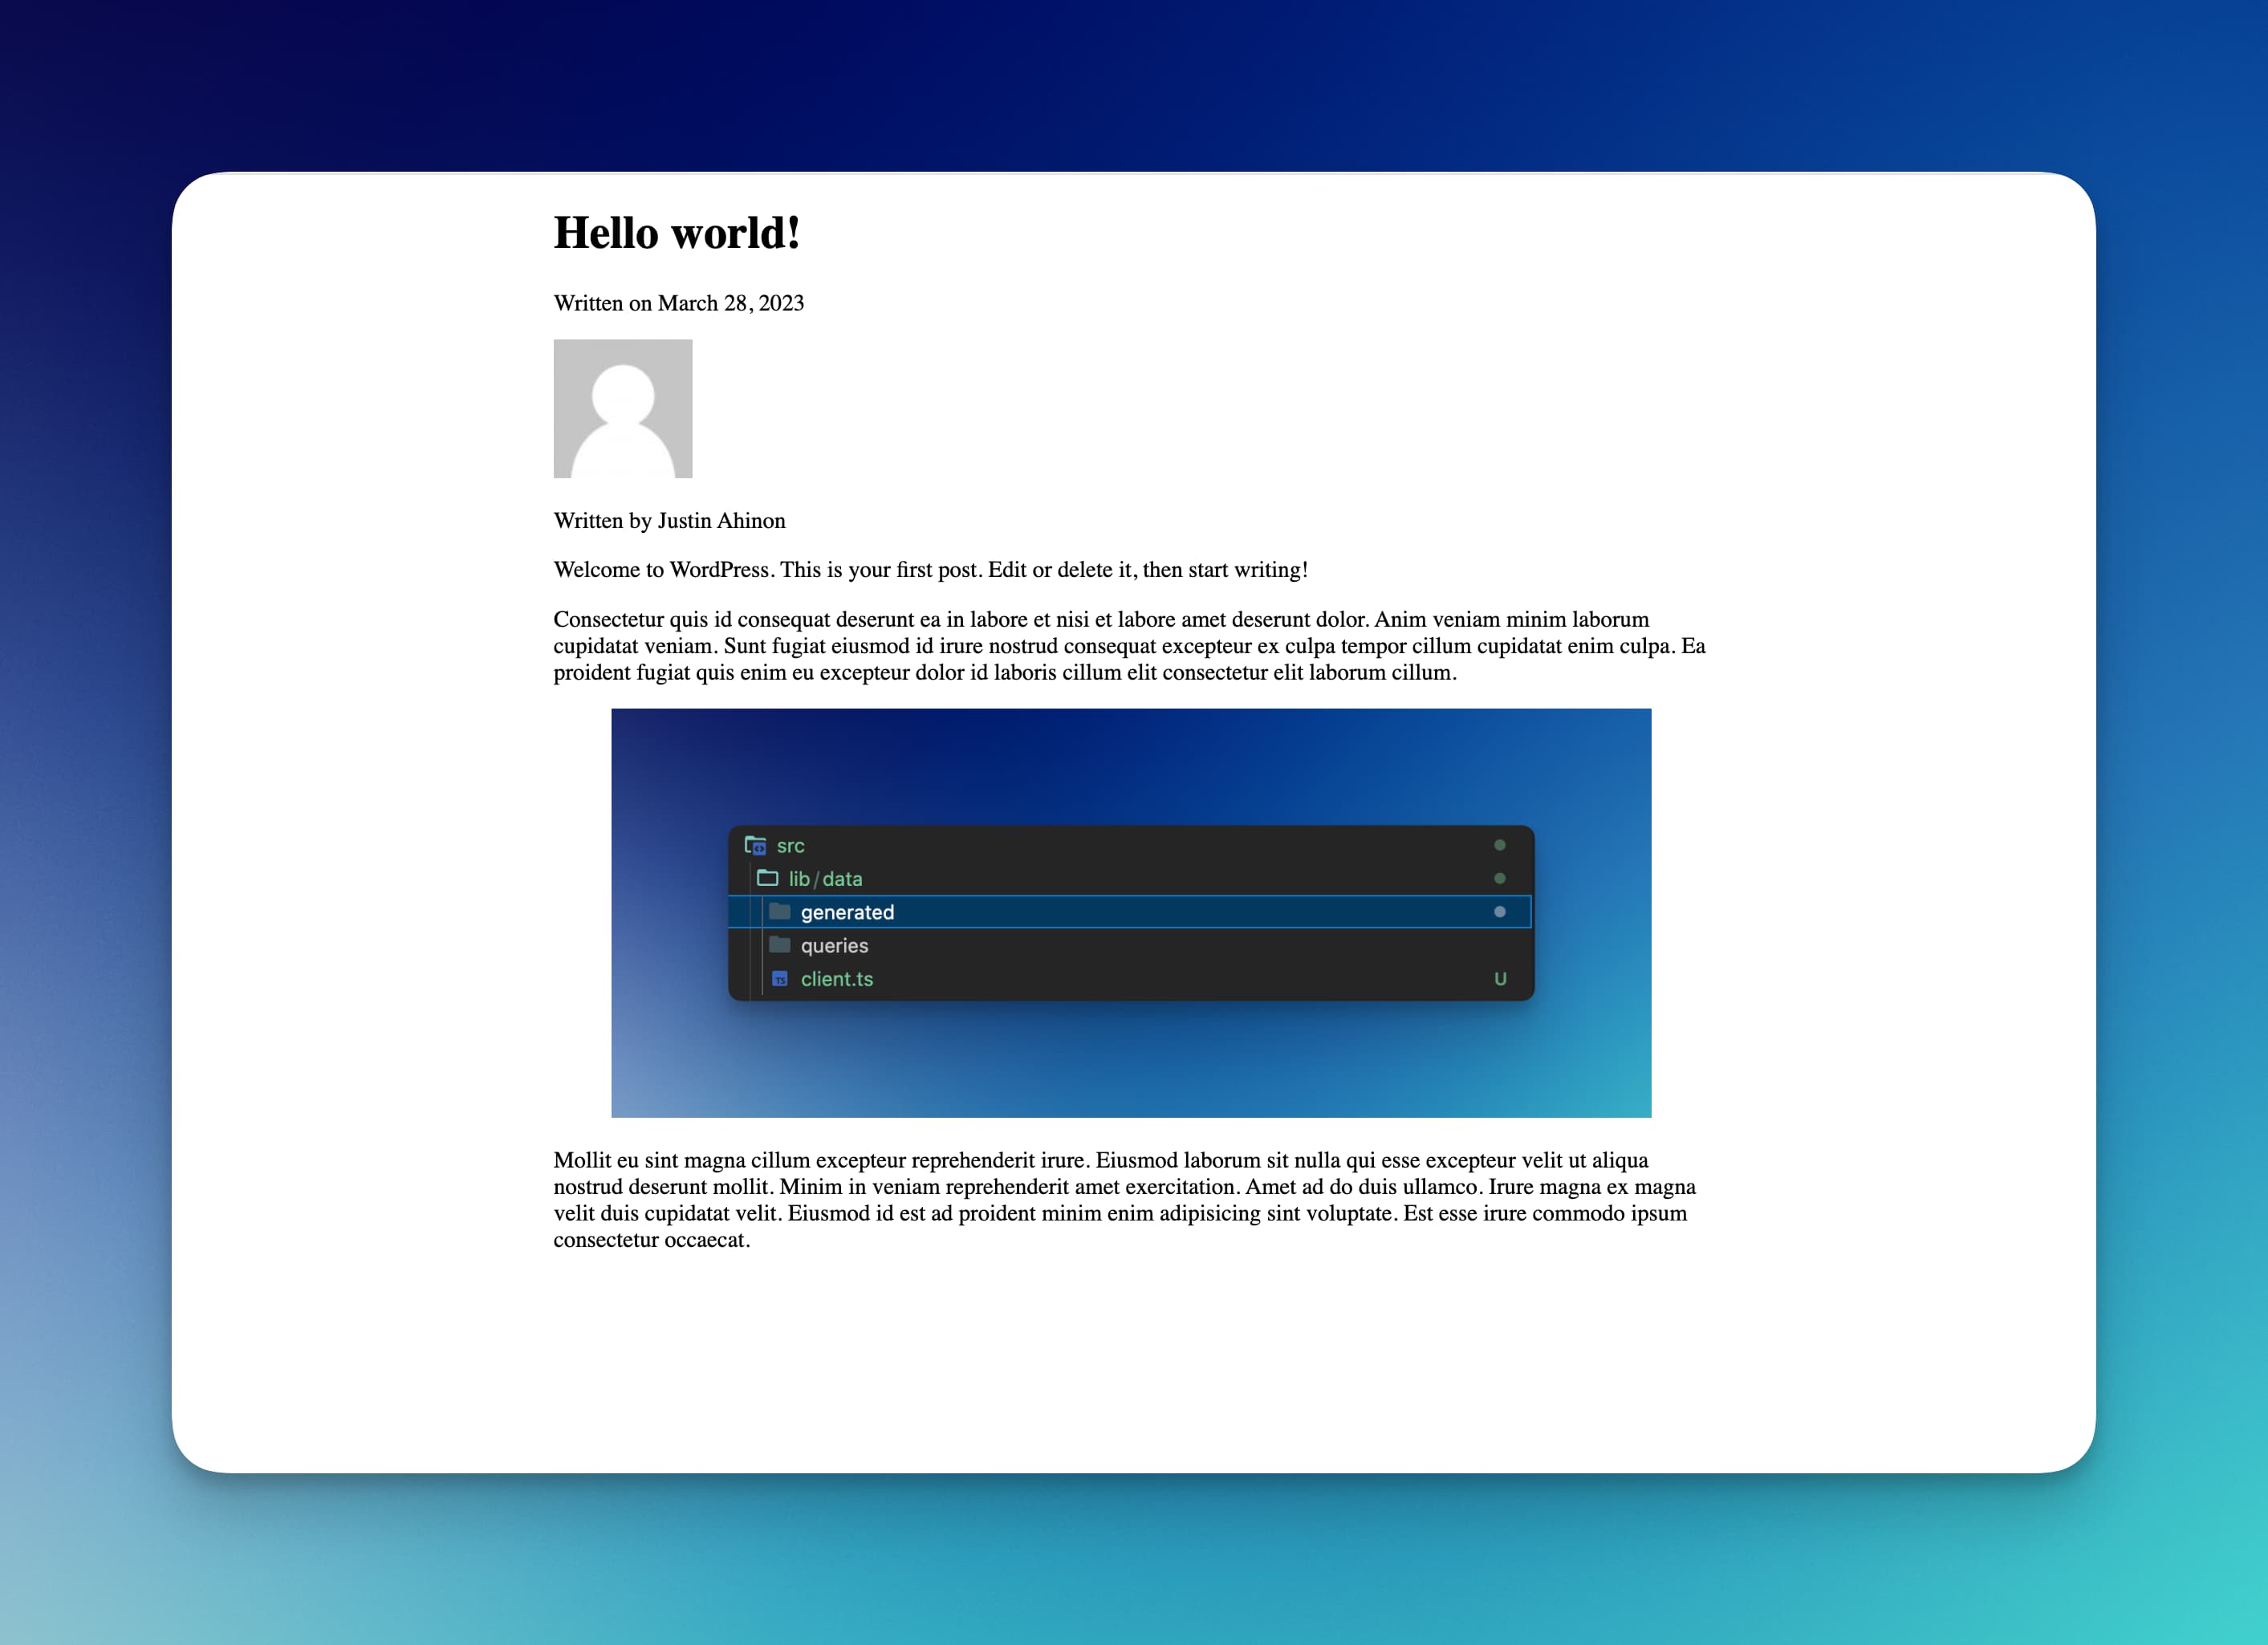
Notice how we are using the @html directive to render the post content. This is because the content field returns rendered HTML by default.
With the same approach, we can get the list of blog posts to display the blog archive, get specific pages, etc.
We can also use plugins like ACF or Yoast SEO coupled with their respective WPGraphQL extensions for more advanced usage to get more data.
Wrapping up
I had a lot of fun writing this article, and I hope you enjoyed it as well. I like the combination of SvelteKit, GraphQL, and WordPress very much. It's a powerful stack that allows you to build fast and scalable websites.